
Capturing and Processing Intrinsics
CRITICAL PREREQUISITE:
We provide 4K and FHD demo intrinsics to streamline your setup so you can start recording immediately. These can be found in the Camera Manager.
To use these intrinsics, set the focus on the Laowa lens to infinity.
We strongly advise that you create your own lens intrinsics for any long-term or permanent setups, as the validity of the intrinsics will be identical to your situated cameras.
A camera profile in Genesis defines the camera intrinsics (focal length and principal point). You can either:
- Generate a new intrinsics file using the Genesis Live application.
- Import an existing intrinsics file (YAML)
1. Setting up Peel Capture for Intrinsic Calibration
- Open Peel Capture
- Go to File > New Shoot to create a new shoot.
- In the Devices tab, verify that your cameras are connected.
- If you need help configuring your Peel project, refer to our documentation here.
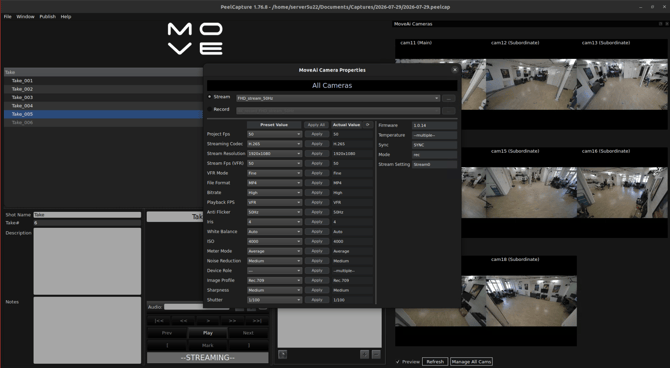
- Click Manage All Cams to open the camera settings for all connected cameras.
- Set Stream mode as enabled.
- Click on the toggle to find the camera presets created in Peel Capture. I have included the preset options below.
- FHD_stream_50Hz
- FHD_stream_60Hz
- 4K_stream_50Hz
- 4K_stream_60Hz
- Note: We recommend streaming in FHD for Pre-Viz, so capturing your intrinsics in FHD is sufficient.
- Now that your streaming settings are configured, you are ready to begin the intrinsic capture process. The Recording button will display a grey label reading ‘-STREAMING-’ to confirm your settings are configured correctly.
2. Key Principles for Capturing an Intrinsic Calibration
Intrinsic Calibration
Watch this video to see how to capture the intrinsic calibration.
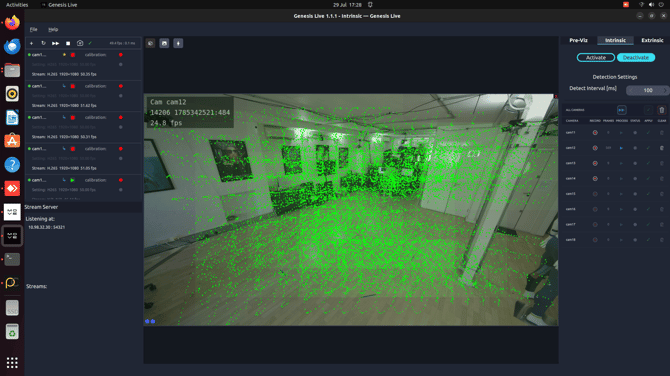
- Move Slowly: Smooth motion improves corner detection.
- Take Close-Ups (Very Important):
- Bring the checkerboard to the edges of the image without losing visibility of any of the checker intersections. It's important to cover the edges, as this is where the most lens distortion occurs.
- Ensure the checkerboard remains at a moderate distance from the camera. It’s important that the checkerboard doesn’t get too close. This could result in the image losing focus, resulting in unusable or distorted data
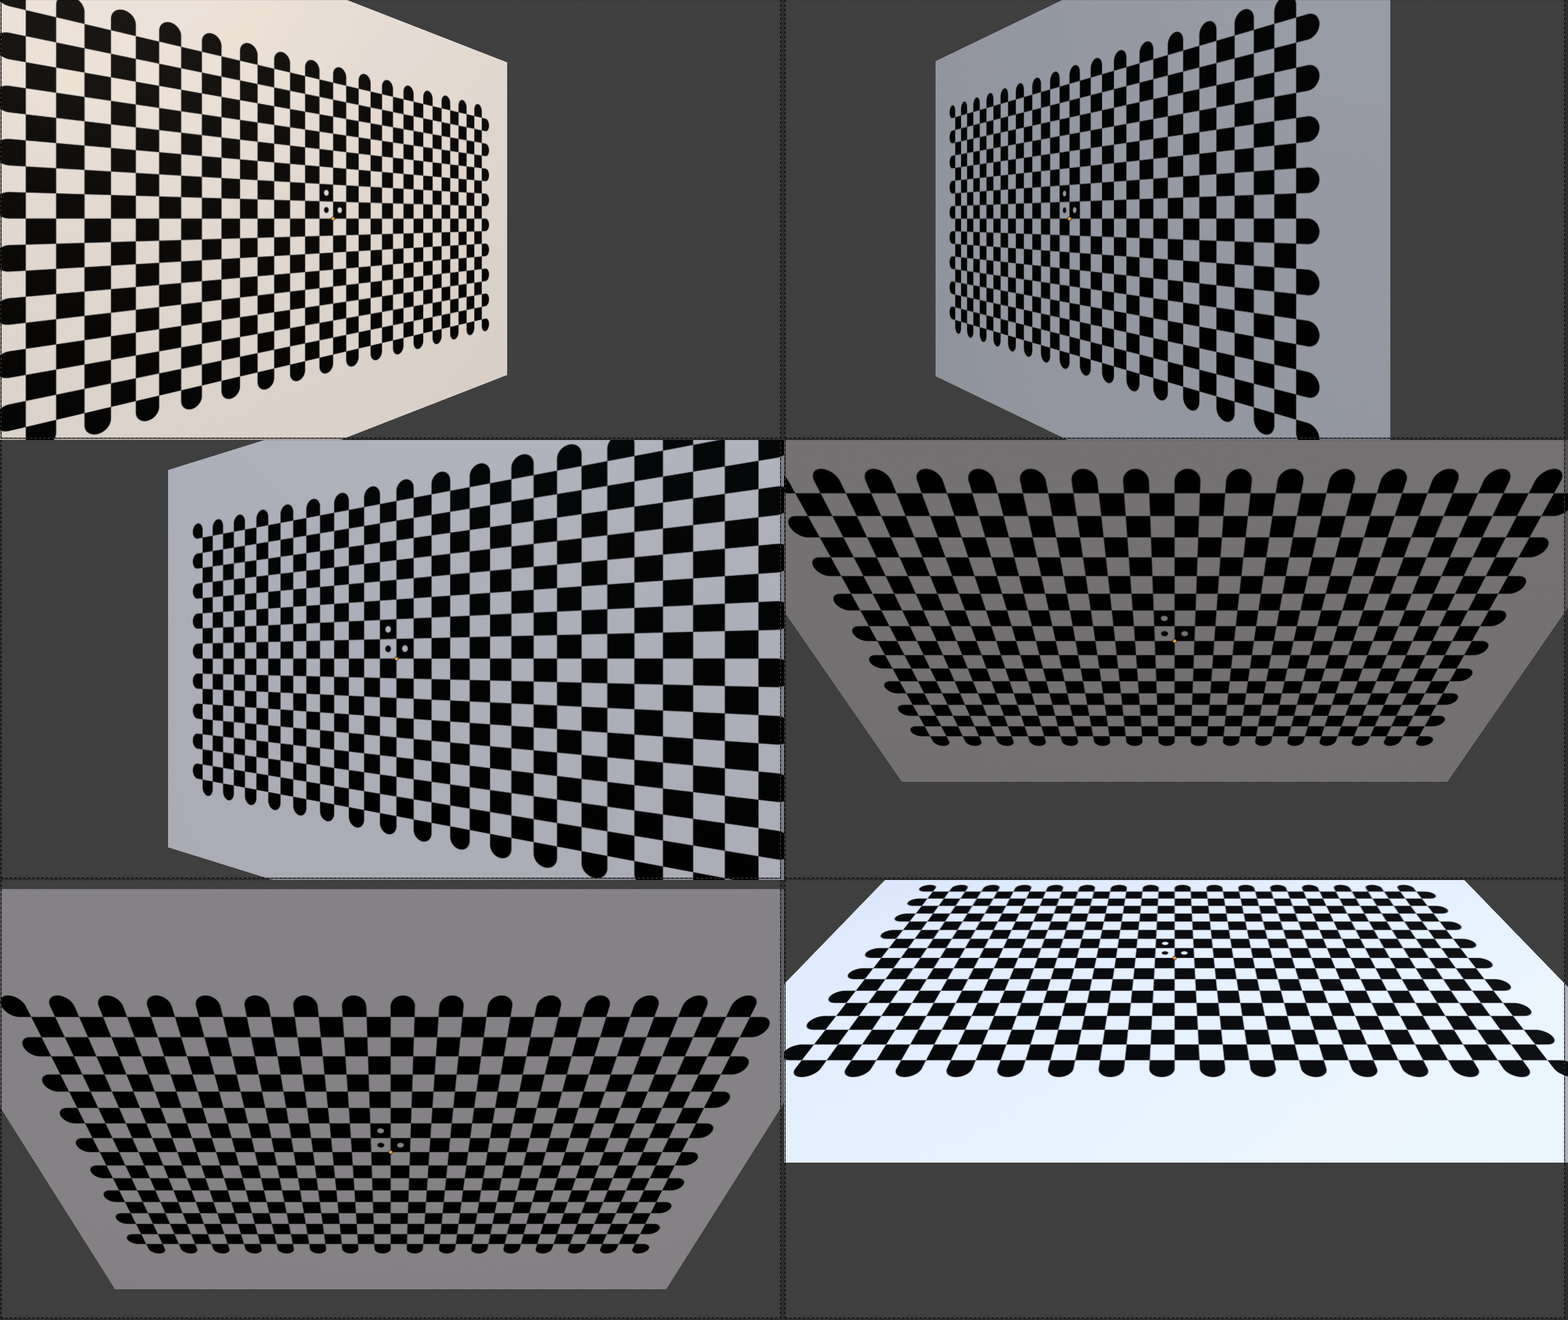
- Keep the Board Tilted:
- Aim for ~45° tilt, ideally between 30° and 70°.
- Frames where the board is flat and far away provide little useful data.
.png?width=601&height=314&name=image%20(3).png)
- Corner Visibility:
- All inner corners must be visible for a frame to be used.
- If any inner corner is occluded or outside the frame, that frame is ignored.
- A few missed frames are normal and not an issue.
- Full Image Coverage:
- Aim to capture inner corners across the entire image plane, including near all edges.
.png?width=670&height=214&name=image%20(5).png)
-
- Orientation Variety
- Rotate the board around all axes.
- Avoid capturing only front-on parallel views.
- Avoid Motion Blur:
- Blurry frames cause incorrect corner detection.
- Increase lighting and/or camera framerate if needed.
- Orientation Variety
3. Capturing Intrinsic Calibration in Genesis Live
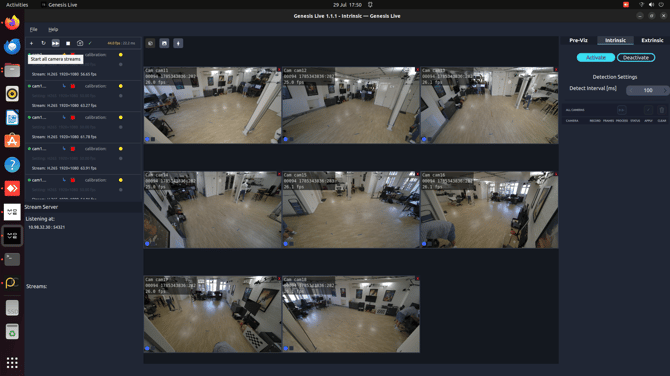
Prerequisite - When capturing an intrinsic calibration, make sure the Genesis Live application is visible on your monitor so you can view the Z Cam stream while calibrating in the capture space.
Note: In our studio, we connect the computer to a TV so we can see a clear image while capturing the intrinsic calibration.
- Click the Play icon to open the main camera stream. This is the first camera for which you will capture an intrinsic calibration. You can capture intrinsic calibrations in any order, as long as the main camera stream is opened.
- Note: The main camera stream needs to be playing for subordinate camera streams to open in the Genesis Live software.
-
- This will display a list of the cameras added to your system.
- Note: Intrinsic calibration can only be recorded for cameras that have their stream open. If a camera's stream is not open, its row will be greyed out and unavailable for recording.Click Intrinsic>Activate
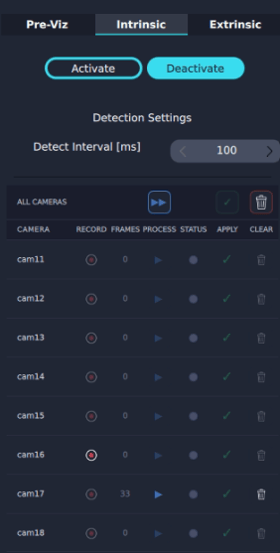
- Click the Record icon to begin capturing your intrinsic calibration. This starts the recording process, during which the system detects keypoints whenever the checkerboard is in frame.
- Follow the protocol shown in the video below, keeping the key principles in mind.
- Click the Stop icon again to stop the intrinsic calibration recording.
- Repeat steps 2 to 4 for each remaining camera.
- Click the Process all recorded cameras icon.
- This begins processing the intrinsic calibration. The status indicator turns green when the calibration has processed successfully.
- Note: You can continue capturing intrinsics for other cameras while a intrinsic is processing.
- Click Apply all calibration outputs for this camera.
- The calibration icon for this camera will turn yellow, indicating it is ready for extrinsic calibration.
- Click File>Save all
Next Step: Capturing Extrinsic Calibration in Genesis Live→ Continue to the next article in System Prep & Setup.