For the best results, use the following step-by-step process to build your Actor Profile.
An Actor Profile stores the specific skeletal data for a performer. By applying a single profile across all takes, you ensure consistent bone lengths throughout your project, rather than relying on per-take estimations.
- This provides consistency in the bone lengths in the pre-retargeted output data.
- This ensures the highest-quality animation solve.
-
This provides consistency in the bone lengths in the pre-retargeted output data.
-
This ensures the highest-quality animation solve. </aside>
-
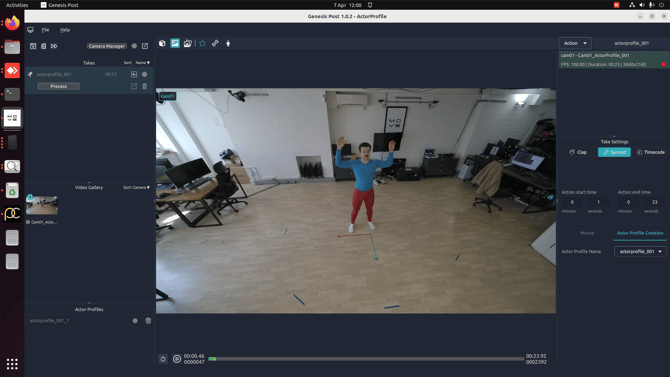
To access the Actor Profile settings, please verify that the take is categorized as an Action in the interface.
-
In the Take settings, select the sync method for your action take.
- If using a synchronised camera such as the Z CAM, select Synced or Time Code depending on whether you require time code synchronisation with your animation data.
- If you are not using a synchronised camera, select Clap Sync and enter your clap times.
- Set your Action Start and End times based on duration of your Actor Profile.
From here, configure the remaining settings:
- Switch the Action Take mode from Mocap to Actor Profile Creation
- Select an existing profile to overwrite it, or create a new one
- Actor profiles can be renamed from the Actor Profile list on the left hand side, by double clicking on the name
- Click Process on the desired Take, or use the Process All Takes button (far right in the project options bar to queue up all available takes).
Note: A calibration must be processed before the Actor Profile can be created. This will be handled automatically if using the Process All Takes button.